How to Draw a Seahorse Step by Step
This tutorial shows how to draw a seahorse with a detailed ten step breakdown that includes illustrated examples and easy to follow instructions.
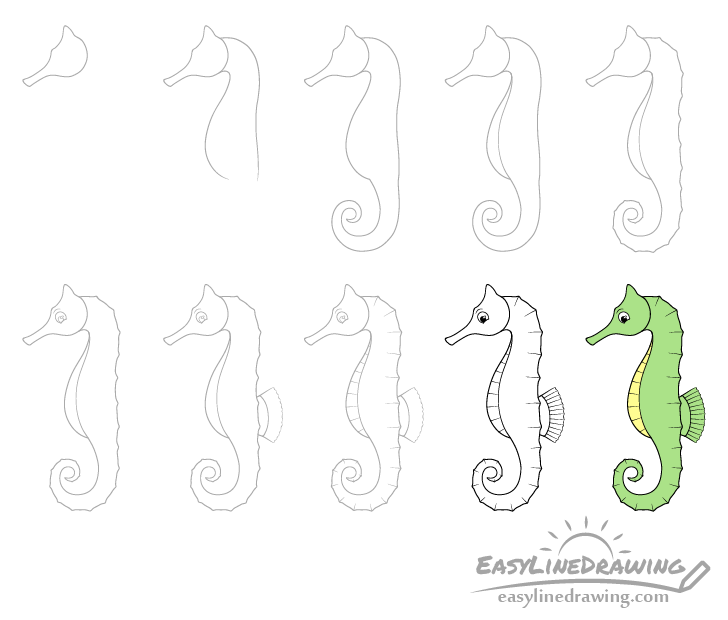
The seahorse is draw in a simple cartoon style to make things easier for beginners. You can see a preview of the drawing steps in the image above.
Start the tutorial in pencil and make light lines as you will need to do some erasing in between a few of the steps. You can trace over your drawing with a black pen or marker later on.
Step 1 – Draw the Head of the Seahorse
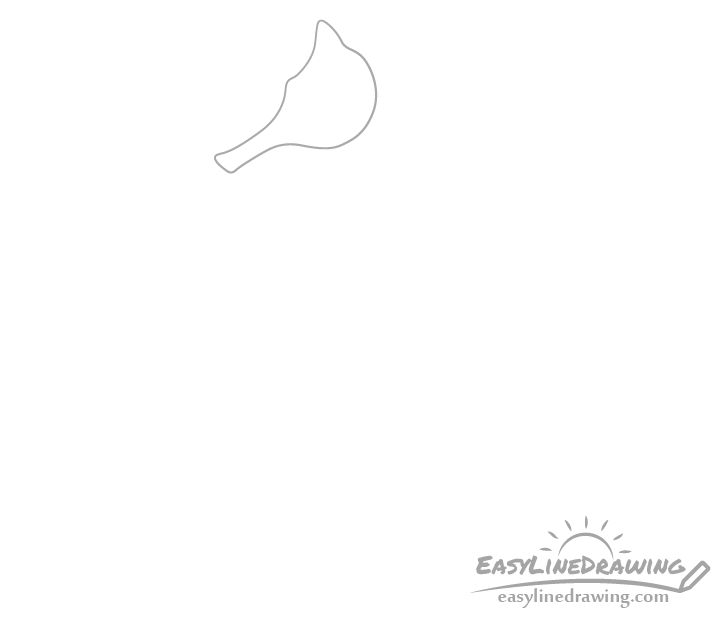
First outline a silhouette of the seahorse’s head. It’s shape is somewhat irregular so just try to copy the one in the example as closely as you can. Be sure to give it a fairly narrow mouth, a curved bottom and a couple of bumps on it’s top.
Step 2 – Draw the Body
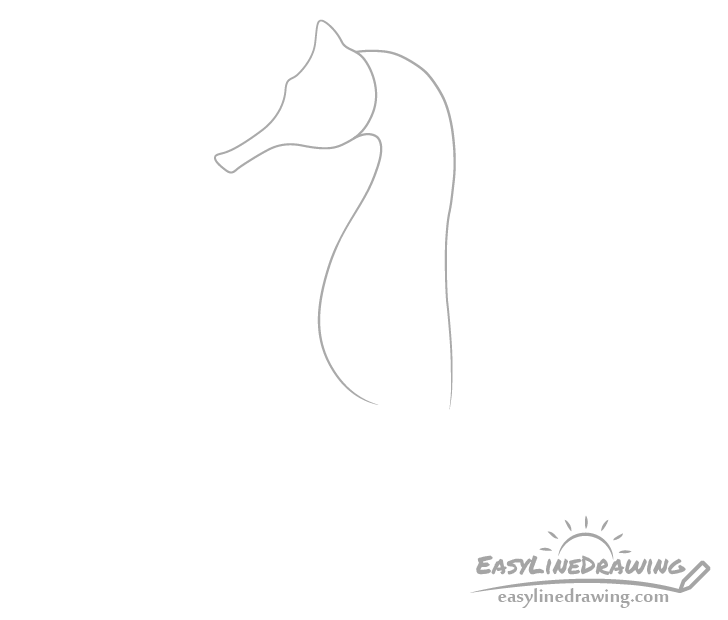
Draw the body with a question mark (?) like shape. Give it a curved neck with a “puffed out” belly.
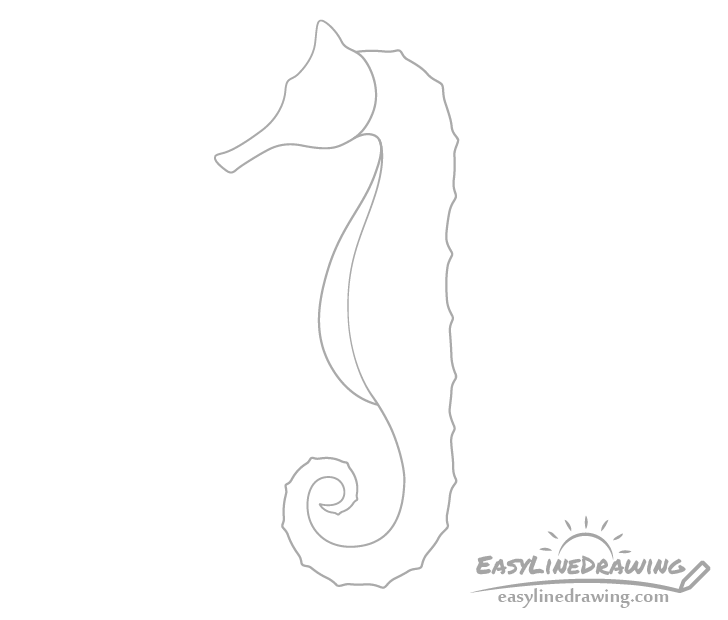
Step 3 – Draw the Tail

Going down from the body add the tail. Draw it with a swirl-like curve and make it narrower as it goes towards the tip.
Step 4 – Outline the Stomach

For this quick step draw a line to separate the stomach from the body as shown in the example.
Step 5 – Draw the Bumps
Draw a series of bumps along the back of the body and tail.
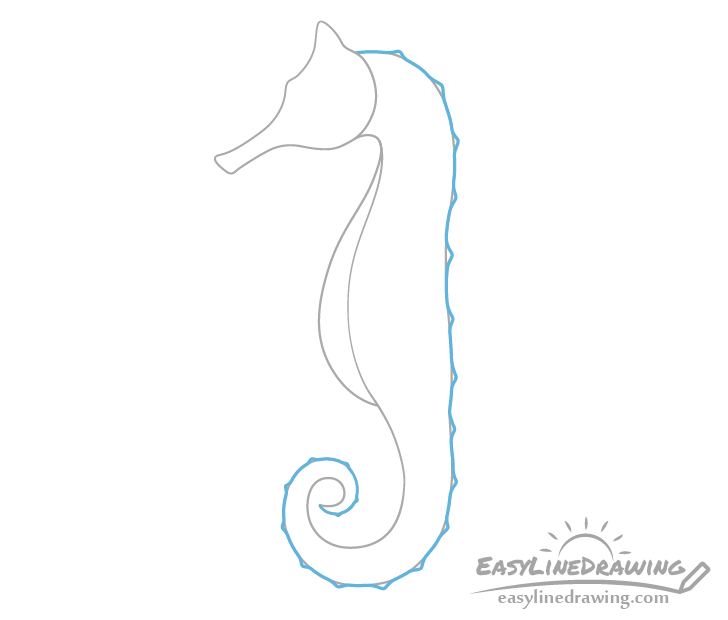
You can first add the bumps as in the example above and then erase little bit’s of the outline between them so that you have a clean looking drawing like in the example before that.
Step 6 – Draw the Eye
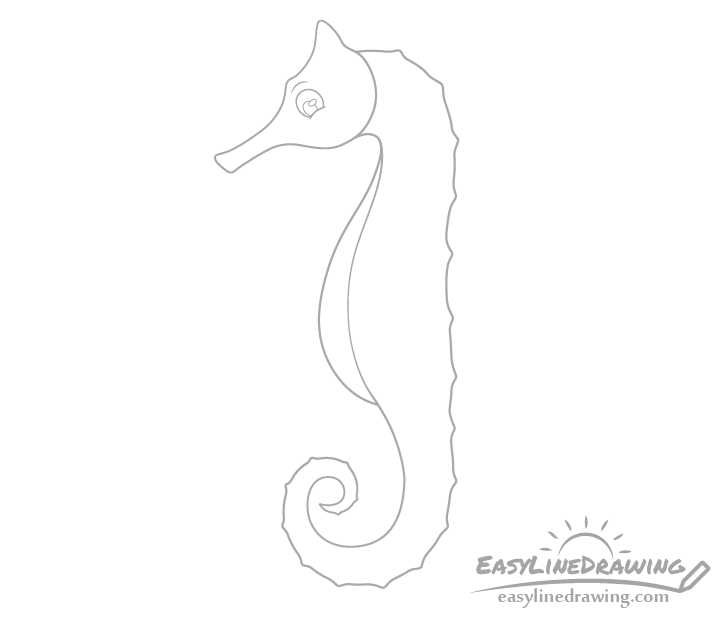
Add the eye just below the bump in the middle of the head. As this is a somewhat stylized seahorse it will be drawn a little different from that of a real one.
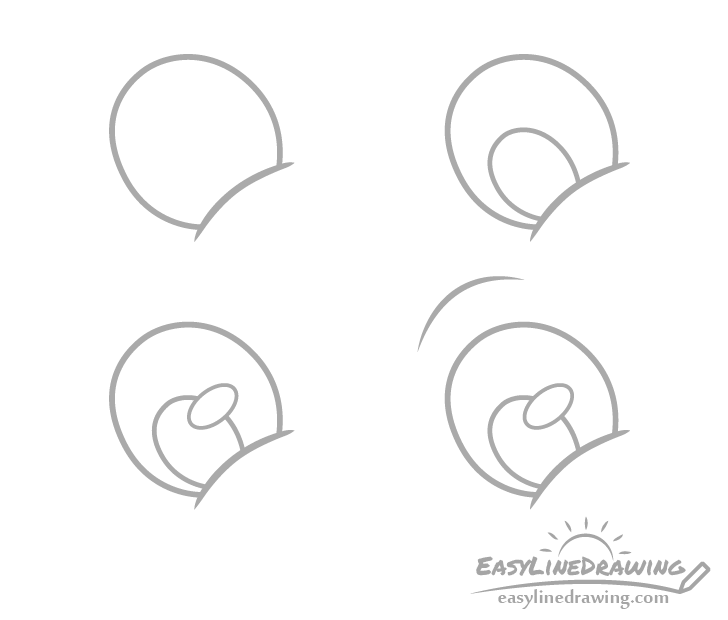
You can see a step by step breakdown of drawing the eye in the example above. Do at is follows:
- Draw the outline of the main shape o the eye
- Add the pupil shaped similarly to the outline but smaller
- Add an oval shaped highlight (light reflecting from the eye)
- Add a little curve above the eye similar to an eyebrow
Step 7 – Draw the Fin

Towards the lower part of the body add the fin. Make it’s shape similar to a fan where it gets wider as it goes out.
Step 8 – Draw the Body Details
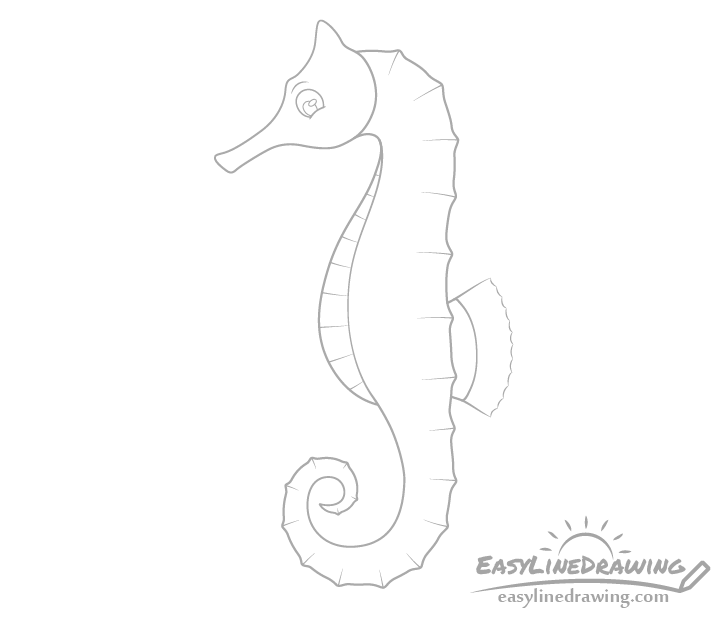
To further emphasize the bumps on the seahorse’s body you can draw a series of lines coming from each of them as shown in the example You can also draw some lines along the stomach.
Step 9 – Draw the Fin Details & Finish the Line Drawing
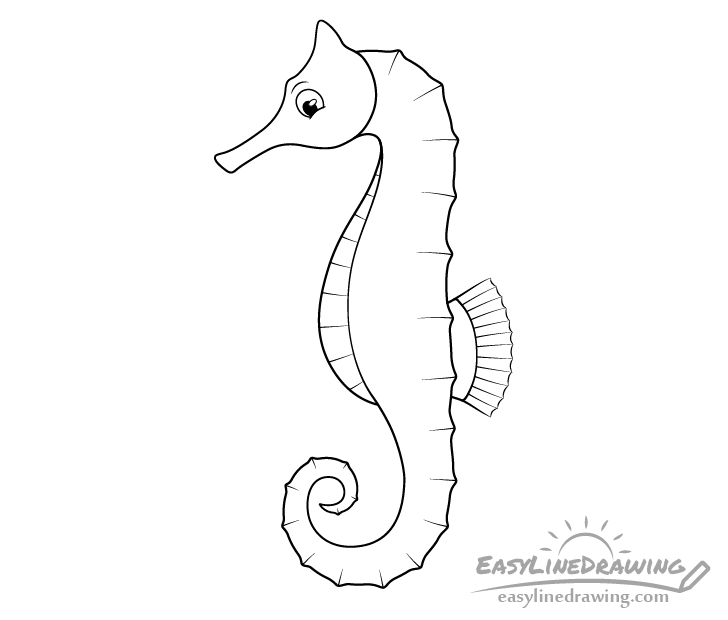
Finally add the details of the fin with a series of lines that go from it’s base to it’s edge.
Once done adding all o the parts and details of the seahorse confirm that your drawing looks good and make any changes if needed. Afterwards trace over your lines with a black pen, marker or darker pencil lines.
You can also fill in the pupil of the eye with either black or dark pencil shading (leave the highlight/reflection white).
Step 10 – Color the Seahorse
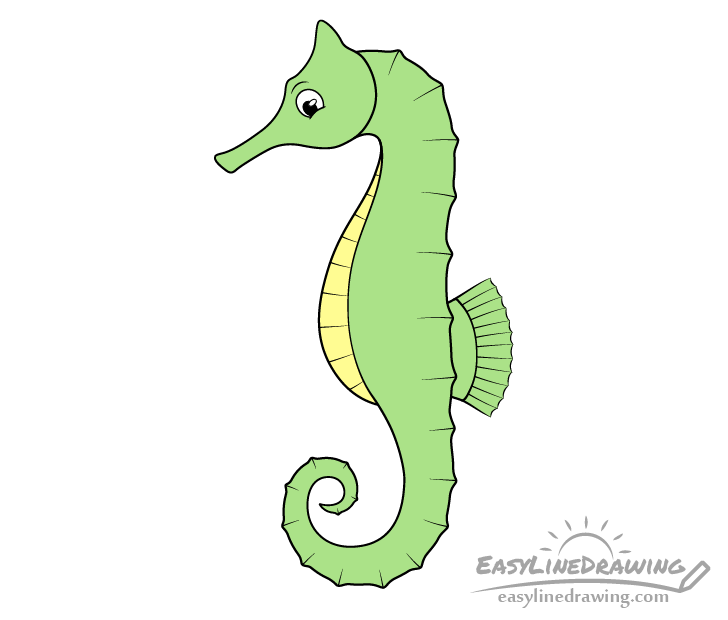
Coloring the seahorse is very simple. You can make it’s stomach yellow and the rest of it’s body green. Some other good color options for the body can be orange or brown.
Once done coloring you should have a finished drawing of the seahorse.
Conclusion
Seahorse’s are somewhat unusual looking creatures which can make them interesting to draw. The example provided in this tutorial is done in a fairly simple style to make it easier for beginners to follow along. Hopefully you’ve found the detailed breakdown of the drawing process helpful.
If you enjoyed this tutorial and would like to try a few more like it you can also see the following:
- How to Draw a Goldfish Step by Step
- How to Draw a Penguin Step by Step
- How to Draw a Tortoise Step by Step