How to Draw a Dress Step by Step
This tutorial shows how to draw a dress in six steps. It provides very simple illustrated examples and quick and easy to follow tips.
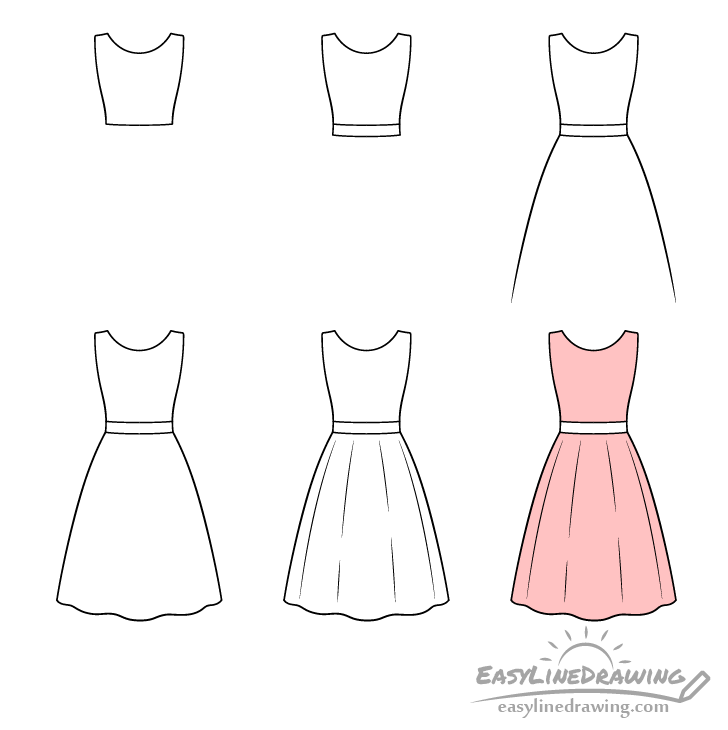
The dress in the examples has a very basic design that can be easy to draw even if you are a beginner. You can see a preview of the drawing stages for it in the picture above.
Start the tutorial in pencil and make light lines that are easy to erase in case you make a mistake. You can darken them later on with a black pen or marker.
Step 1 – Draw the Top of the Dress
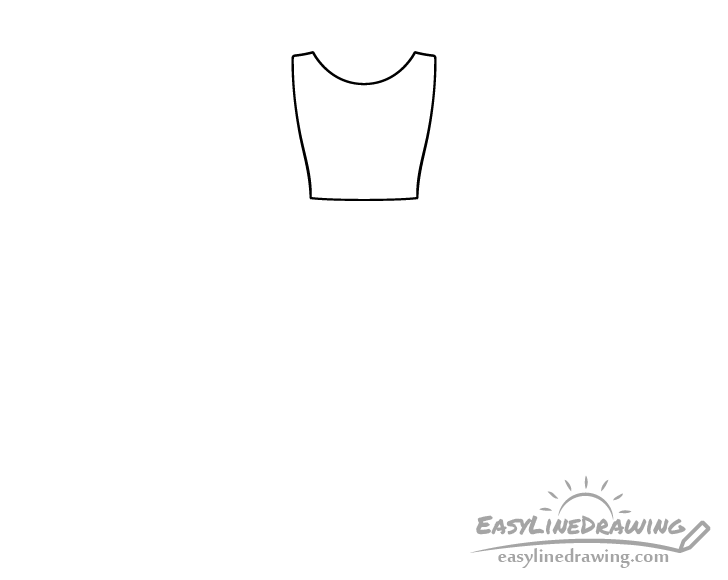
First draw the top of the dress. This will include the openings for the neck and arms. You can draw the opening of the neck as a simple curve while the openings of the arms should blend into the area that runs down to the waist.
Step 2 – Draw the Waist Area
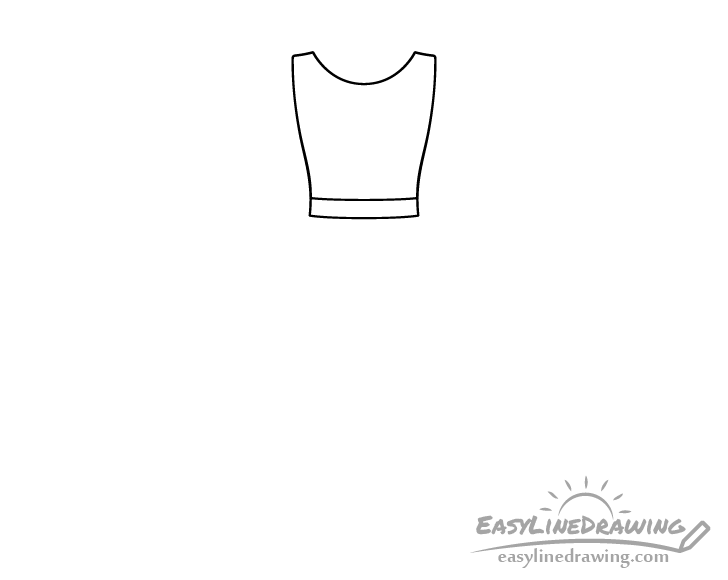
Below the previous section add the lower body and waist area. Draw it a sort of “belt” with a slight curve to its’ overall shape.
Step 3 – Draw the Sides
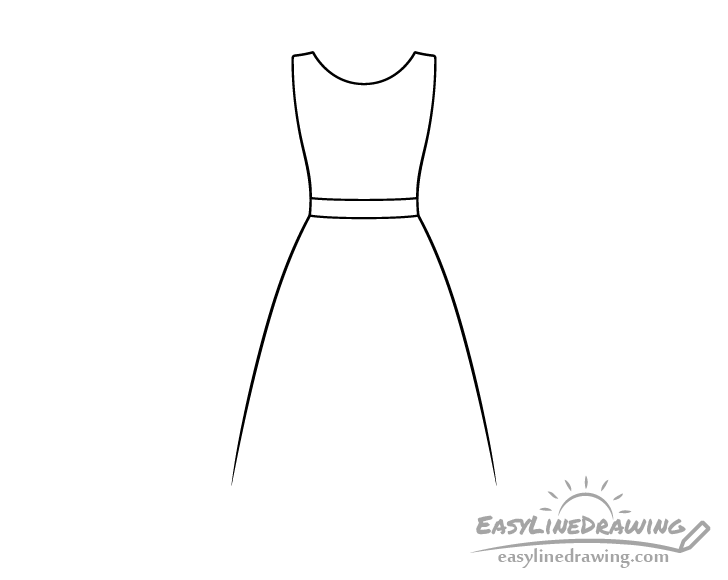
Add the sides of the lower part of the dress as a pair of curves with one mirroring the other. Make this section significantly longer than the upper part.
Step 4 – Draw the Bottom
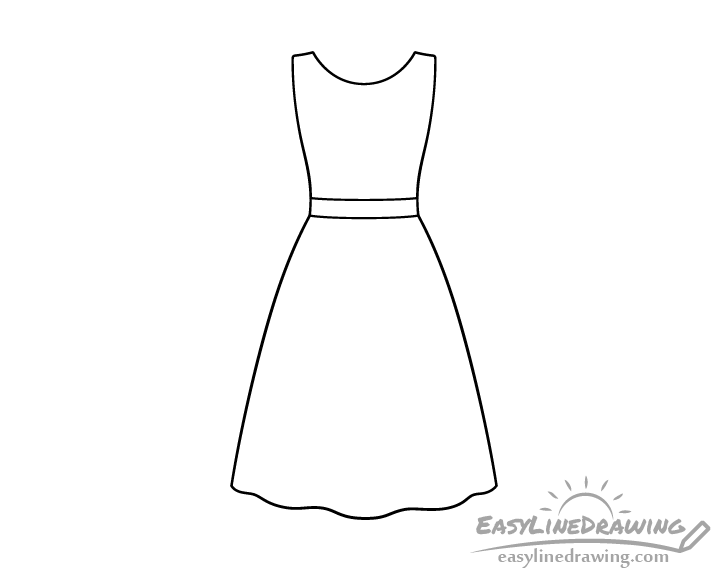
Finally add the bottom of the dress as an uneven wavy line that have a curve to it’s overall shape.
With that you should have a basic outline of the dress.
Step 5 – Draw the Folds & Finish the Line drawing
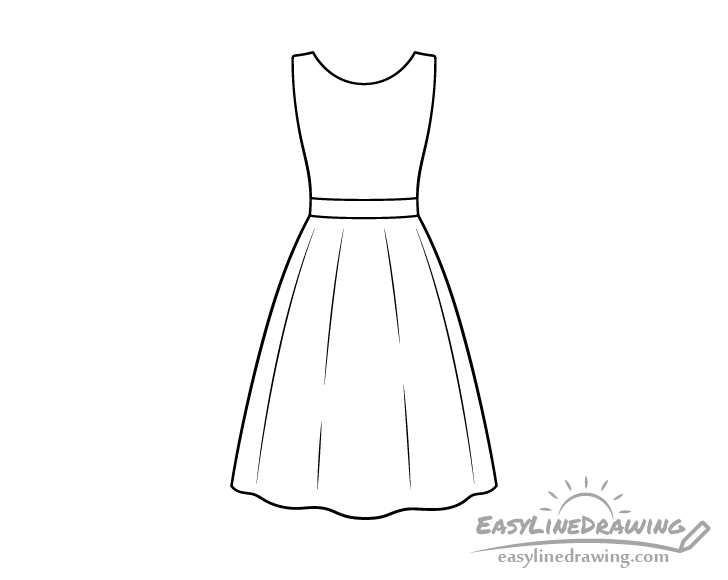
Add a few folds to the lower part of the dress. Draw these as several curved lines that run along the lower part of the dress. You can draw a couple of the folds with breaks in them just so that they look a little more uneven.
Once done adding the folds trace over your drawing with a black pen or marker. Just be sure you are happy with the way things look before doing so as it will be difficult to make corrections afterwards. If you don’t have one of those around you can simply darken your lines with the pencil instead.
Step 6 – Color the Dress
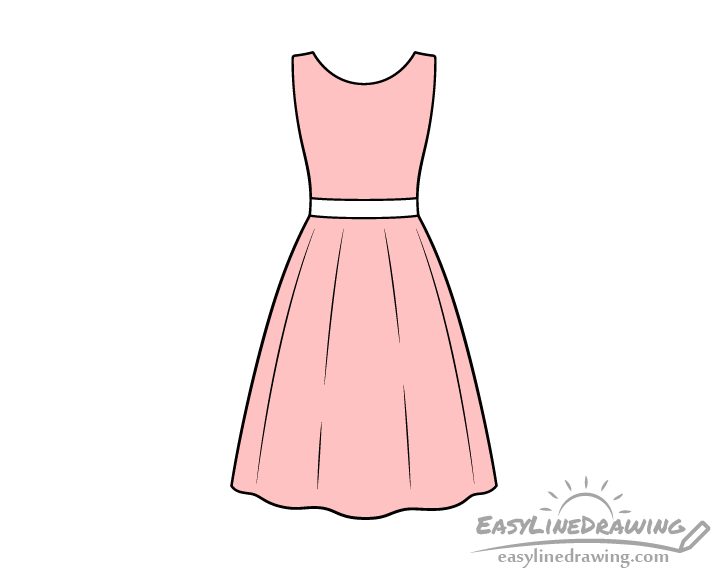
In this example the dress is pink but you can use just about any color if you prefer. For a brighter looking dress you can use markers. For milder colors water based paints or colored pencils can both be good options.
Whatever options you choose once done coloring you should be done with the drawing.
Conclusion
The dress in this tutorial is very simple and hopefully you’ve found it easy to draw. If you want to get more create you can also try and give it some sort of a pattern. Again, first outline it in pencil and then trace over it with a maker just like the rest of the dress (before coloring).
For more tutorials on drawing clothes also see the following:
- How to Draw a Suit Step by Step
- How to Draw a Scarf Step by Step
- How to Draw a Beanie Hat Step by Step
- How to Draw a Mirror Step by Step