How to Draw Blueberries Step by Step
This six step tutorial shows how to draw blueberries in a small bunch. It also shows how to add a few leaves to make the drawing look nicer.
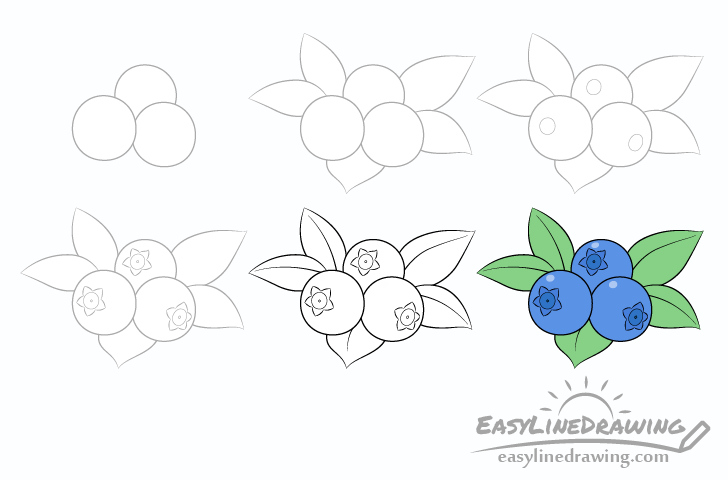
Overall the tutorial is fairly simple and should be easy enough for beginners. You can see a preview of the drawing steps in the example above.
Start the drawing in pencil and be sure to make light lines that are easy to erase you need to make a correction. You can darken them later on with a black pen or marker.
Step 1 – Draw the Outer Shapes of Each of the Blueberries
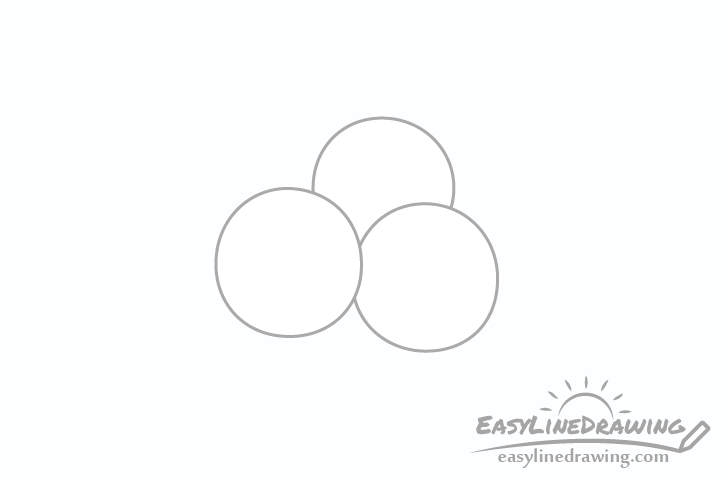
Make the blueberries very slightly oval in shape. The ovals don’t need to be perfect as some unevenness will make them look more natural.
First draw the blueberry in front, next draw the one slightly behind it and finally the one at the back.
Step 2 – Draw the Outer Shapes of the Leaves
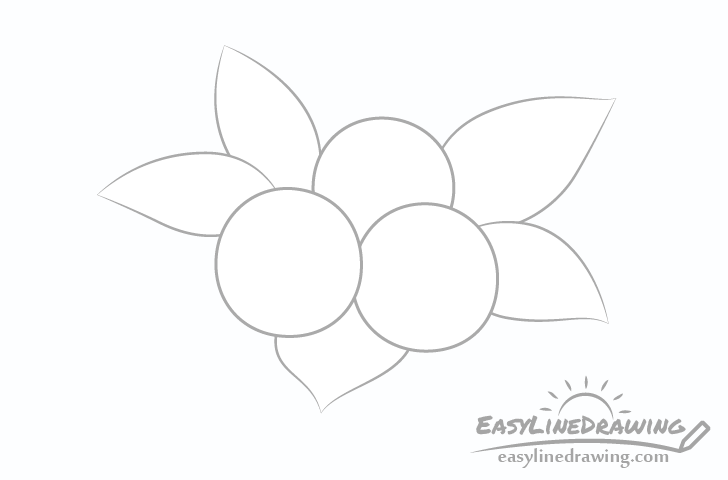
Draw the leaves sticking out from behind the blueberries (there will be five in total). For this step you can draw each leaf with just two curved/wavy lines. Also try and give them fairly pointy tips.
For drawing other types of leaves see:
- How to Draw a Maple Leaf Step by Step
- How to Draw an Oak Leaf Step by Step
- How to Draw a Grape Leaf Step by Step
Step 3 – Draw the Tips of the Berries
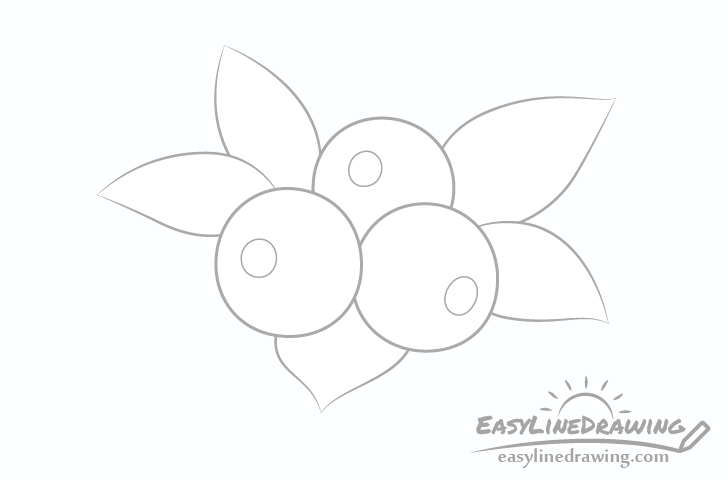
You can indicate the tips of each of the berries with another series of “ovals” Technically these are circles but because they are being viewed/drawn on an angle they will appear to be oval in shape.
The positions of the tips will indicate which direction each blueberry is facing in. Generally you will want them to be facing slightly away from one another so try and place the tips as shown in the example.
Step 4 – Draw the Inner Details of the Berries
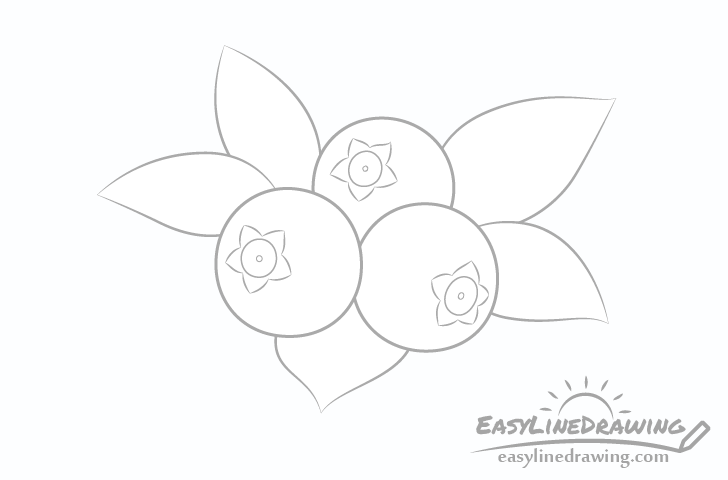
Around the ovals from the previous step draw a sets of petal like shapes. You can place five in total around each one. These should basically look like stars with curved edges. Inside the same ovals draw some tiny inner ovals (almost just dots).
Once done you should have all of the parts of each berry outlined.
Step 5 – Finish the Line Drawing
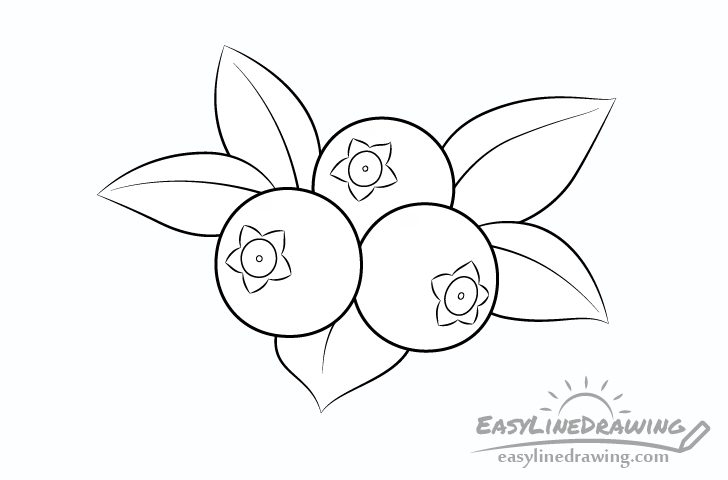
For the last little bit of details add the midribs of the leaves. You can show each of these as a single curved line running from the base of each leaf towards the tip (but no touching it).
Once done with the leaves you can go over your drawing with a black pen or marker. Alternatively you can also just darken the liens with the pencil.
Step 6 – Add Some Color
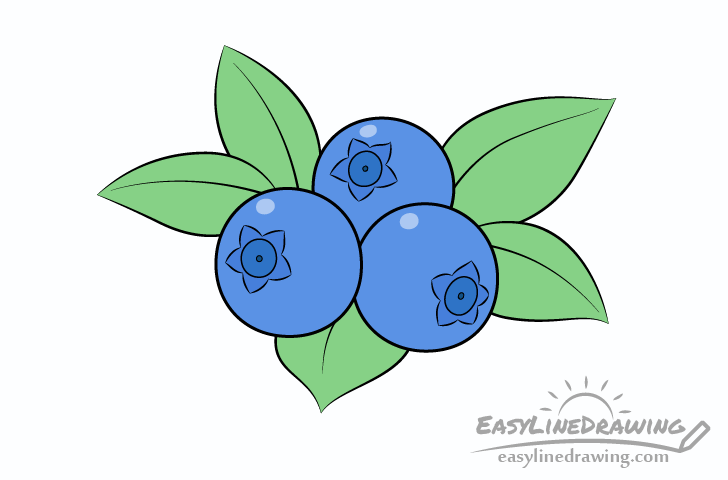
To color the drawing you can use pretty much any medium you like (paints, colored pencils, markers, etc…). Make the leaves green and make the berries blue but leave small white (or light blue) spot in each berry to show little reflections. It can be a good idea to lightly outline the reflections before coloring so that you don’t accidentally go over them.
Finally make the tips and the surrounding “petals” a slightly darker blue. Some easy options for doing this are to just press harder on a blue pencil (if that’s the coloring method you used) or to lightly shade these parts with a regular pencils.
Conclusion
While the the berries in this tutorial are somewhat simplified they still definitely look like blueberries. Even a simple or stylized drawing of an object can be easily recognizable when done correctly.
Hopefully you’ve found the drawing instructions in this tutorial helpful and easy to follow.
For more similar guides also see:
- How to Draw Cherries Step by Step
- How to Draw Grapes Step by Step
- How to Draw a Plum Step by Step
- Strawberry Drawing Step by Step
- How to Draw a Flower Step by Step


